Chapter 2 - Installing kali with VMWare player
Part1 - Installing and basic overview of Kali Linux
Resources
Introduction
In this section we will setup Kali Linux, Windows 7 and Metasploitable 2 as Virtual Machines (VMs) using VMWare Player on a host computer. Setting up our testing lab using virtual machines makes it very easy to learn offensive computer security testing using Kali.
Virtual machines make it possible to run several operating systems on a single computer. That way we do not need a room full of computers to set up a testing and learning environment.
We only need one machine powerful enough to run several Virtual Machine sessions at once. For the book I used a Windows 7 Core I-5 system with 8 GB of RAM. It had plenty of power to run all three of our lab operating systems at the same time with no problem at all.
If you have experience with Virtual Systems, you can use any Virtual Machine software that you want. But for this tutorial I will be using VMWare Player as the host software, and then install Kali, Metasploitable 2 and Windows 7 in separate VMs running under the host.
When done, you should have a small test network that looks something like this:
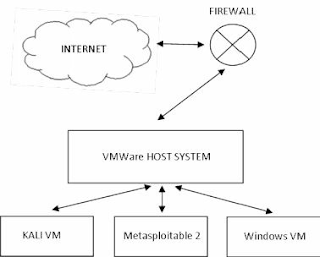
Because we will be dealing with vulnerable operating systems, make sure that you have a Firewall Router (Preferably hardware) between the Host system and the live internet.
Install VMWare Player & Kali
Installing Kali on VMWare is extremely simple as Offensive Security provides a Kali WMWare image that you can download, so we will not spend a lot of time on this.
Download and install VMWare Player for your version of OS.
1. Download and install VMWare Player (https://my.vmware.com/web/vmware/downloads)
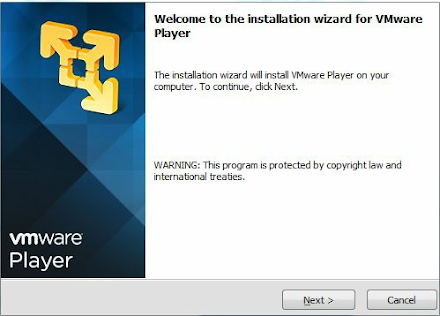
2. Agree to the license agreement and choose where you want it to install it, the default is normally fine.
3. Click, “Finish” when done.
4. Download the Kali VMWare Image (http://www.kali.org/downloads/) and save it in a location where you want it to run from.

(Note: It is always a good idea to verify the SHA1SUM with the downloaded image to verify you have a legitimate copy of the image. There are numerous MD5/ SHA1 freeware programs available.)
5. Un-GZip and Un-Tar the downloaded image (7-Zip works great).
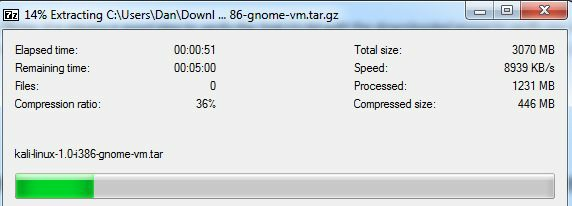
6. Start the VMWare Player.
7. Click, “Player” from the menu.
8. Then “File”
9. Next click, “Open”.
10. Surf to the extracted Kali .vmx file, select it, and click, “Open”.
11. It will now show up on the VMWare Player home screen:
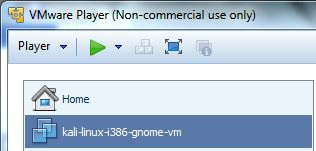
12. With the Kali VM highlighted click, “Edit Virtual Machine Settings”.
13. Here you can view and change any settings for the VM:
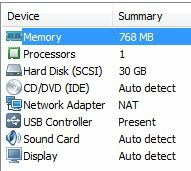
14. Click, “Network Adapter”:

It is set to NAT by default. This will be good enough for what we are doing. NAT means that each Virtual machine will be created in a small NAT network shared amongst themselves and with the host; they can also reach out to the internet if needed.
Each machine will be given a DHCP IP address, which means that the IP addresses might change on the VMs when you reboot them.
(If you need to know Kali’s or Metasploitable’s IP address, just type “ ifconfig” in a Terminal window. On a Windows based VM, just type “ipconfig” at a command prompt.)
15. Click “cancel” to return to the VMWare Player main screen.
16. Now just click, “Play Virtual Machine”, to start Kali. You may get a message asking if the VM was moved or copied, just click, “I copied it”.
17. When prompted to install VMWare tool, select to install them later.
18. When Kali boots up you will come to the Login Screen:
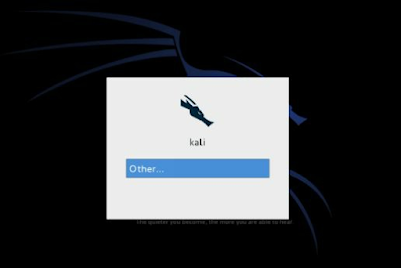
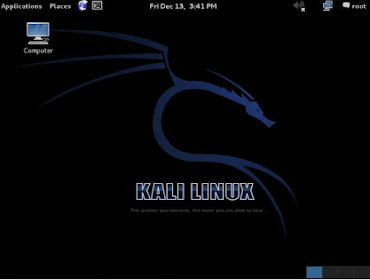
20. You will then login to Kali and be presented with the main Desktop:
Updating Kali
We will cover getting around in Kali a little later, but first, we need to update Kali to the latest version. The VM image is a bit old, so there are a lot of updates that could take a while to download.
1. Open a Terminal Window:
2. Type, “apt-get update” and hit “enter”:

3. And then, “apt-get dist-upgrade”:

(Type, “y” and enter when prompted that additional disk space will be needed.)
This can take quite a while, so this might be a good time for a break, you deserve it!
4. When done, reboot.
There are additional source repositories that you can manually add to Kali if you want.
For example, if you want the absolute latest and greatest, you can add the “Bleeding Edge” repositories to Kali. But these do come with the warning that they are not manually maintained and are low priority.
For more information see:
http://docs.kali.org/general-use/kali-linux-sources-list-repositories
That’s it; Kali should now be installed, updated and ready to go. We will take a closer look at the desktop in the next section.
Installing VMWare Tools for Linux
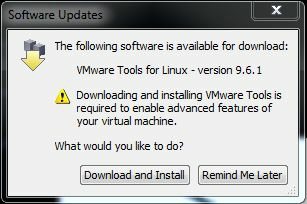
When Kali boots up, a VMWare pop-up should appear asking if you want to install the VMWare tools into the operating system VM.
This allows the OS to work better with VMWare, usually giving you more control over video options and cut and paste capability with the host. You don’t need to install them, but it usually makes things work a little bit smoother.
When you get the pop-up message below, click “Download and Install”:
The tools will then begin to download:
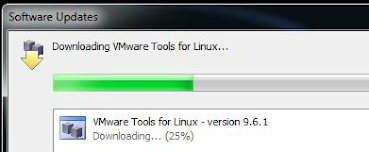
Allow the tools to install and then click, “Close” when finished.
Installing Metasploitable 2
Metasploitable 2, the purposefully vulnerable Linux operating system that we will practice exploiting, is also available as a Virtual Ware VM. As we did with the Kali VM above, all we need to do is just download the Metasploitable 2 VM image, unzip it and open it with VMWare Player.
It’s that simple.
1. Download Metasploitable 2 (http://sourceforge.net/projects/metasploitable/files/Metasploitable2/) and place it in a folder where you want it saved.
2. Unzip the File
4. It will now show up in the VMWare Player Menu:
5. Now go to “Edit Virtual Machine Settings” for Metasploitable and make sure the network interface is set to “NAT”:
Metasploitable 2 is now ready to use.
*** Warning *** Metasploitable is a purposefully vulnerable OS. Never run it directly open on the internet. Make sure there is a firewall installed between your host system and the Internet.
6. Go ahead and “Play” the Metasploitable system, click “I copied it” if you are asked if you moved or copied it.
You should now see the Metasploitable Desktop
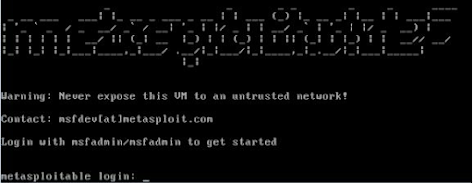
7. Login with the credentials on the screen.
Login name: msfadmin
Password: msfadmin
8. At the terminal prompt type, “ifconfig” to get the IP address of then Metasploitable machine:
msfadmin@metasploitable:$ ifconfig
eth0 Link encap: Ethernet
inet addr:192.168.198.129
The IP address in this case is 192.168.198.129. Because we are using DHCP the IP addresses of the virtual machines may change when we bring the systems down and then back up. So, it is a good idea to check and verify them if you start having communication problems.
We now have our Metasploitable and Kali systems up.
Windows Virtual Machines
In this blog I also use a Windows 7 VM (and a Windows XP VM in a few examples). You used to be able to download a (30-90 day) Windows 7 Enterprise Evaluation version directly from Microsoft, but it looks like most of the links now point to their Windows 8.1 Enterprise Evaluation: http://technet.microsoft.com/en-us/evalcenter/hh699156 So if you want to follow along on the Windows 7 (or XP) sections you will need to install a licensed copy of Windows 7 in VMWare Player.
I will not cover installing Windows 7 in VMWare Player, but basically all you need is your Windows 7 CD and install Key, and do a full install from disk by clicking “New Install” and then pointing to your CD Rom drive.
Then just install Windows 7 as usual.
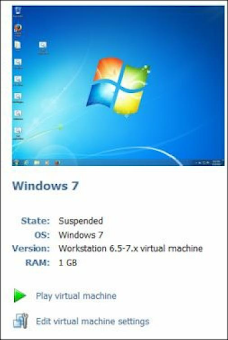
When done, you will have a Windows 7 Virtual Machine:
Check the network settings on it to make sure that it too is using NAT for networking:
Play the virtual machine and run “ipconfig” from a Windows 7 Command Prompt to see what its IP address is:
Microsoft Windows [Version 6.1.7601]
Copyright (c) 2009 Microsoft Corporation. All rights reserved.
C:\Users\Fred>ipconfig
Windows IP Configuration
Ethernet adapter Local Area Connection:
IPv4 Address. . . . . .... 192.168.198.130
And finally, if you want, install the VMWare Tools for Windows when prompted:
That’s it, you should now have three virtual machines in a mini network that you can use to practice and learn basic offensive security pentesting techniques.
Install Wrap Up
In this section we learned how to install VMWare Player as a virtual machine host. We then installed Kali Linux, Metasploitable 2 and Windows 7 as separate virtual machines on the host.
We will use this setup throughout the rest of the blog.
Just as a reminder, with using VMWare’s DHCP, IP addresses of the systems may change when we reboot them. I used this partially because you will always be using different target IP addresses when in the real world.
But if you get lost, you can run “ifconfig” (Linux) or “ipconfig” (Windows) on the VM to find the changed IP address. And finally, never run Metasploitable directly on the internet as it is purposefully vulnerable.
Quick Desktop Tour
Let’s take a moment and take a short tour of the Kali menu and interface.
One of the biggest things you will notice when installing is that Kali is based off of Debian Linux, instead of Ubuntu, which earlier versions were based on. If you were used to Backtrack, the desktop still uses Gnome, but it does seem to have a different look and feel to it.
Top Menu Bar
We will start our tour with the top menu bar.
The top menu has the Applications menu which is the main gateway to access all the included programs in Kali, the Places menu which allows you to navigate around the file system. The Ice weasel web browser is next, and a shortcut to the Terminal prompt follows.
In the middle is the date and time, followed by a volume control icon on the right side, a Network icon, where you can view and edit your network connections and finally your user menu where you can access system settings, switch users or log out.
Applications Menu
The Applications menu is the main menu in Kali.
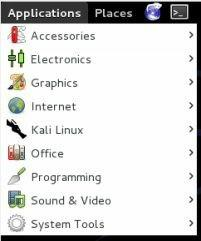
Under this menu you find the following main menus:
- Accessories menu includes the normal tools you would expect to find in an operating system.
- Electronics tab contains a programming utility for the Arduino board.
- Kali Linux is the main menu to access the security programs.
- System Tools contain system administrator tools and preferences.
- The rest are pretty self-explanatory.
Kali Linux Menu
Of most importance to us, the Kali Linux menu option is where you will find most of the security tools.
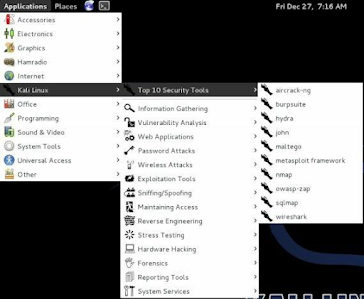
A quick peek at the menu shows that a Top Ten Security Tools menu has been added to Kali so you can get into your favorite tools faster.
Aircrack-ng, Burp suite, Metasploit, Nmap, Wireshark and several other top programs are now right at your fingertips.
If you are familiar with the original Backtrack don’t worry, all the regular tools are still present in a menu system very similar to the one Backtrack used.
To navigate the menu, just find the topic you want, for example, Information Gathering and follow the menu across until you find the utility you want:
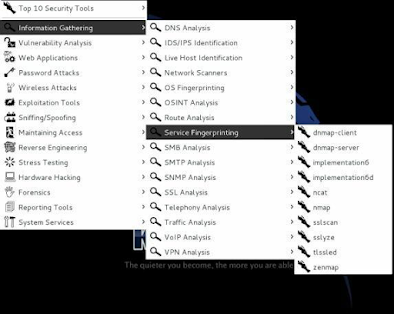
Following down the main menu branch you will see that the tools are sorted by type. Web Application testing programs can be found in the Web Applications menu option, all Password related security programs are under the Password Attacks menu and so on.
Conclusion
If you want, it would be a good idea to take a few minutes and surf the menu system until you are familiar with its layout.
Many, if not most of the programs can be run directly from the command prompt, and there are additional programs included in Kali that are not in the menu system.
We will cover several of the utilities that come with Kali. We will also cover a few that have not been added in yet but are very good tools for any security tester.




Awesome, I found it useful compared to through all my search in web. Waiting for complete tutorial
ReplyDelete